Most people do not indulge in DIY repair projects in their homes. Part of it is because they don’t have the right skills or tool for it. However, some appliances, devices, and systems can be repaired easily. This is, of course, true only of smaller malfunctions. Here is some helpful advice on how to go about repairing your AC.
 Tools and Supplies
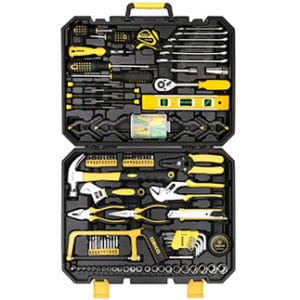
The essential tools which will come in handy are also tools which every household might have or need. You’ll need a wrench, some pliers, a set of screwdrivers, a drill with extensions, and a multimeter.
Some of the material you might need for DIY AC repair are a capacitor, extra fuses, fan motor, and a contactor.
Start With Smaller Things
AC not cooling? Say no more. Often times the solution is pretty easy and straightforward. First of all, you need to shut the power off before you do any further inspection or cleaning. Safety precautions are never to be neglected. This can be done by opening the electrical box which is located right by the condensing unit.
Next, you will want to inspect the condenser coils and possibly clean them. This should be done from time to time anyway, to preserve your AC system. Clean the coil thoroughly and repeat a couple of times during the year. The amount of cleaning will depend on how often you actually use your AC.
Check For Blockage
There are several things you can check right away, just to make sure. Apart from cleaning the condenser coil, you can also check if the furnace filter is clean and if the registers in your house are open. If any register or filters were blocked it will surely affect the flow of the air in your home. It might be the reason there is no cooling.
The condenser coil can have a blockage, as well as, the compressor. Check and clean both. You also might notice that you need a new filter. Try replacing it with a new one to see if that will do it.
If you’ve removed the clogs, cleared the vents and cleaned everything let your AC run for a while. If it’s still not cooling then the problem isn’t solved just yet.
 Inspecting the AC Unit
If the problem wasn’t fixed by cleaning and replacing certain parts you will need to inspect more thoroughly.
Test How IT Functions
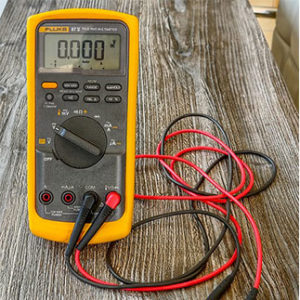
First off, try checking all the fuses in the disconnect block. For this part, you may use a multimeter (in this case, we recommend you a HVAC multimeter and here you can see our top picks). Set the multimeter to the lowest scale on Ohms and connect the leads with each fuse. If there is a problem the multimeter will be reading a negative result. In some cases, the multimeter might be showing the infinity sign. In both cases, this might be indicative of a blown fuse.
Additional Check-Ups
While the power is off, find and check the access panel in your home. Look carefully if any wires are damaged or chewed through. Sometimes the damage might come from pests living inside the building.
Replacing Different Parts
Sometimes your AC system might just be in need of a new part. Once the part is replaced it works like a charm. Parts which could possibly need to be replaced are a contractor, a capacitor, or the fan motor.
 The Contactor
The contactor is part of the condensing unit. A new contactor can be found for less than 20 dollars. There are numerous cases where the contactor is the source of the problem. If this is the issue, you are in luck because it is a really cheap and easy repair. Remember that this particular part should be replaced every couple of years. So keep checking it regularly.
The Capacitor
The capacitor is the part required to store and release electricity. All AC systems will have at least one capacitor. This part of the AC unit will also wear off as time passes. The problem is that they can get used up without anybody actually noticing. This can lead to the capacitor simply breaking down overnight. This is why the capacitor should be checked and replaced in a timely manner. If it is not replaced on time, it can damage other parts of the AC. Like the contactor, it should be replaced every couple of years.
Luckily for you, it is not hard to replace a capacitor. You will need to disconnect all the wiring. Remember to memorize the way they were connected. Better yet, take a picture to refer to later. Discharge or release any remaining energy in the capacitor. Use pliers to disconnect wires from the old capacitor and to reconnect them to the new one. Once, you’ve finished check if each wire is in the right place and tightly connected to the new capacitor. Lastly, make sure the new capacitor is tightly secured in its place.
The Fan Motor
Use a screwdriver to unscrew the fan motor, replace it with a new motor. Use different screwdrivers to secure it in place. Connect the new motor wires with the conduit. Make sure the wires are out of reach of the blades. This is important since you don’t want any wires to be cut when you turn on the fan.
 Test Your Repairs
Whenever there is a slightest change, replacement, or repair done on an AC unit it needs to be tested. In most cases, the period the AC unit needs to reboot is at least 10 minutes. Make sure you are patient enough to wait out the required time. This is the only way you will find out if your repairs were not futile.
Don’t Fret If the Repairs Did Not Work
If none of these replacements end up working you don’t need to fret. This only means that the damage or malfunction is bigger than a small replacement and has to be done by an expert. In some cases, you could not have fixed it yourself because you don’t have the proper parts or expertise. You will have to call a professional and let them fix it for you.
The post AC Not Cooling? DIY Repair Guide appeared first on Tool Nerds.
from Tool Nerds https://ift.tt/2D6IGX6
via IFTTT
No comments:
Post a Comment