How often did you have to deal with broken festive fairy lights? You plug in the whole string of them only to discover that they’re not working at all, which immediately kills the festive mood and the spirit of Christmas. And, as you already know, this beautiful holiday feels incomplete when there are no pretty fairy lights to illuminate the Christmas tree, or maybe even the roof, the backyard, and the garden.
It’s one of the most common problems, and it can, fortunately, be solved with a little bit of DIY fixing. In this article, we will provide you with a short but comprehensive guide on how to identify and fix the issues in your Christmas lights with the help of a digital multimeter (DMM).

What Happened to my Christmas Lights?
To set things off, let’s first have a look at the most common reasons that can keep the festive lights from glowing at their full glory. Here are a couple of possible causes:
- Damaged sockets or bulbs
- Broken or non-functional fuses
- Torn or damaged wires
- Non-functional or damaged power plugs
Steps to Fix the Problem
Fixing a string of beautiful Christmas lights isn’t as closely challenging as some people might think it is, although the level of difficulty depends on how complicated the issue is. For successful troubleshooting, one should possess the necessary equipment to determine the exact nature of the problem.
In the following paragraphs, we will assist you with successful identification of the problem’s cause and help you fix it in the shortest possible amount of time.
The Tools Needed
Before we begin with the troubleshooting, we need to get a couple of tools, and they are:
- Multimeter
- Voltage Tester
- Wire Cutter
- Electrical Tape
- Soldering Gun
- Solder Roll
Step 1 – Checking for Damaged Wires
Before plugging the string to see if the lights are working and if there are dead bulbs, take a couple of minutes to carefully examine the item. Your goal should be identifying torn wires and damaged insulation. When not tackled beforehand, issues in the wire can lead to leakage of current, and therefore to serious injuries and even electrocution.
In case you find torn or exposed wires during this process, you will have to work on fixing them immediately. Here’s how to do that:
- At places where you identified missing insulation, use some electrical tape to wrap the exposed wire with it. The electrical tape will act as an insulator and successfully prevent the dangerous leakage of the current.
- In case you find a broken wire, carefully mark around an inch of insulation on both sides of the breakage and pull it out with pliers.
- Twist the wires together to make a secure connection, and then solder the joint to make it even more secure. To do this, hold the soldering iron and that specific part of the wire, and once it turns hot, simply apply some solder and the joint will be sealed.
If that was the only problem with your string of Christmas lights, you can safely plug them into an AC supply and they should be working without any issues. But if the damaged wires and torn insulation were only just one part of the problem, the lamps won’t light up or only one section of them will work.
This means that there’s a problem with the power plug, which leads us to the next step.
Step 2 – Checking for a Faulty Power Plug
If your Christmas lights are fine, the next step includes checking the power plug. In some cases, a faulty power plug is the main culprit for the absence of the current in the string of lights, and identifying this problem early can save you a lot of time.
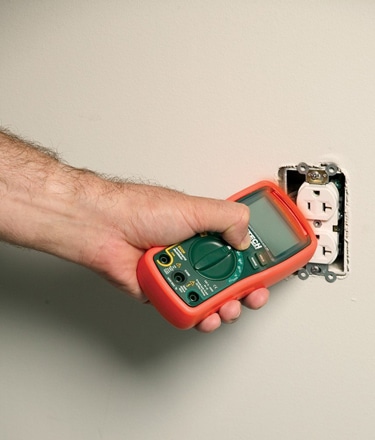
- Place the probes of your digital multimeter at both ends of the power plug.
- Take a look at the resistance value (or the indicator light) displayed on your device.
- In case it indicates a closed circuit, the plug is fine. If it does not, it means that your plug is damaged. You’ll need to have it replaced, or you could just buy a new set of Christmas lights.
Step 3 – Checking for Damaged Sockets and Bulbs
Now that you have verified that your plug works fine and have made the required repairs in the wire, the last part of the process is checking the sockets and the bulbs. Unfortunately, this can easily turn into a time-consuming job, although that depends on the amount of bulbs in your Christmas lights.
This is when a quality voltage tester comes into play – it’s a device that can detect the alternating AC voltage (the “hum”). This process can be finished with a multimeter or a continuity tester too, but it’s not that practical as it requires the user to check every bulb manually. Instead, follow these steps:
- First, you will have to locate the bulb wire. It’s the one that enters and leaves every bulb socket.
- Once you locate it, carefully run your voltage tester along it while following into and out of every socket. As long as your gadget is detecting the “hum”, everything is fine.
- In case the device fails to detect the alternating current, you’re dealing with a bad socket/bulb. You’ll need to purchase the replacement bulbs, and they will have to be of the same wattage and resistance as the faulty ones. Using bulbs of a higher resistance will almost certainly cause them to blow out.
- Turn off the power and use the wire cutters to discard the broken lamps.
- Place your new bulbs (of the same resistance) into the empty sockets.
- If any of the new bulbs are not glowing, you will have to replace the sockets too. To do this, turn off the power and use your wire cutter to trim the wire that comes from both ends of the socket. Take a new socket and connect the wires with it. Don’t forget to secure the whole thing with some insulating tape.
Turn on the power and check if all the bulbs are illuminated. If not, you’ll have to use the voltage detector again and find the rest of the faulty bulbs.
The post How to Fix Your Christmas Lights Using a Multimeter appeared first on Tool Nerds.
from Tool Nerds https://ift.tt/2LwknC1
via IFTTT
No comments:
Post a Comment