Painting your gun is an easy project for which you have to prepare your area, weapon and the right color. And if you are reading this, chances are you need assistance with these tasks. Don’t worry; you are at the right place.
Now and then, every gun owner wants to restore its weapon and brings back its previous shine. The best way to do that is to use gun spray paint that will do the best possible job. In our reviews, we have explained everything you need to know about the best products on the market. We have included their features, advantages, and disadvantages.
For a very reasonable price, you can get a fantastic product which you could use for your next DIY project. But, before you start painting your gun, you will need to prepare. In this article, we will talk more about this topic and help you to do the job right.
So, if you want to know how to prep your gun for painting, just keep reading.
1. Decide What Parts of the Gun You Want to Paint
Every part of the firearm can be painted, but it is up to you to choose the design you prefer. There are many possibilities. For example, you could spray only plastic parts of the weapon, or you can paint the whole gun. Maybe you want to get that perfect camouflaged look you always wanted or just decorate your pistol in one color. That depends on your personal preferences. When you have decided which color scheme you will use, you are ready for the next step.
2. Clean your Firearm
When you are cleaning your weapon, you should keep in mind that paint for guns will stick to its surface. You need to clean it properly so that it can last longer. It is essential to remove all the dirt, grime and oil so the color can stick to the parts of the weapon. If you use a greasy or a dirty one, the paint won’t adhere properly, and it won’t last much longer than it would on the better-prepared one.
Clean the plastic parts with the 91% Isopropyl Alcohol or Acetone for metal parts. You will find these products easily at your nearest store or Walmart. Use a rag, old cloth or a paper towel and soak it with the cleaning solution and wipe down the firearm. You will know that you have cleaned it properly when the towel and the weapon are not dirty anymore.
After you have done that, make sure that you have removed alcohol or any chemicals. Wipe all the traces of liquids before you begin to paint your pistol because it could damage the paint.
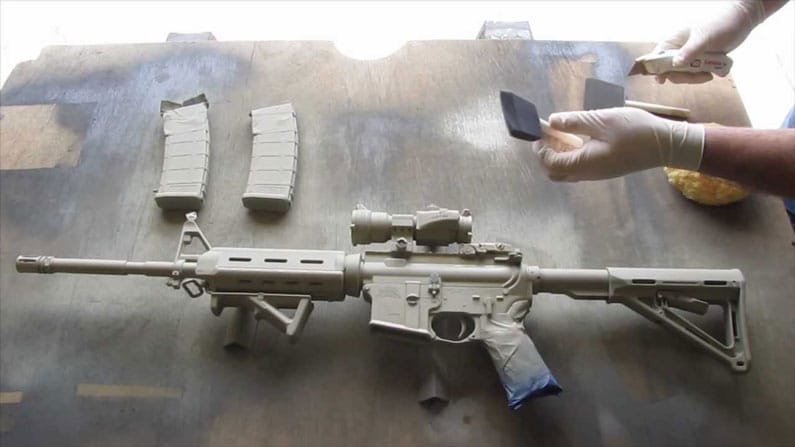
3. Tape the Gun Parts You Don’t Want to Paint
This step is essential, primarily because of the sensitive parts that could be ruined with the paint. Use the Blu Tack or masking tape to cover all the spots of the gun you don’t want to color. If you don’t do that correctly, you might have to spend some time cleaning it and dealing with the damaged areas.
Nobody wants to go through that. So, be very careful when you are protecting the sensitive parts. For the holes on your weapon, it is best to use clay to fill them up. After you have done this step right, you will be able to color your gun without making any mess.
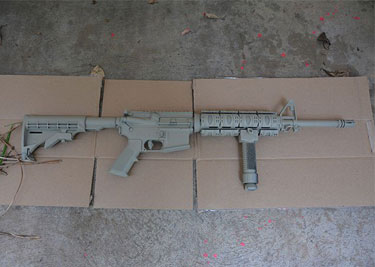
4. Find a Perfect Place for Painting Process
The best place to paint your firearm is outside, of course, if the weather is allowing you. If not, you could always do that in your workshop or garage. Any well-ventilated room where you have plenty of space on the floor will be great for this project. Lay out plenty of cardboard or newspapers to cover ground or carpet.
Your weapon needs to stay in place, so make sure it is not wiggling. Keeping it away from the floor will prevent any contact with the dirt which is essential for the paint. After you did this step, you need to pay attention to your protection. We recommend using glasses when you are painting your weapon. And also use rubber gloves to protect your hands from the paint and from the cleaning chemicals that you have previously used.
5. Final Step
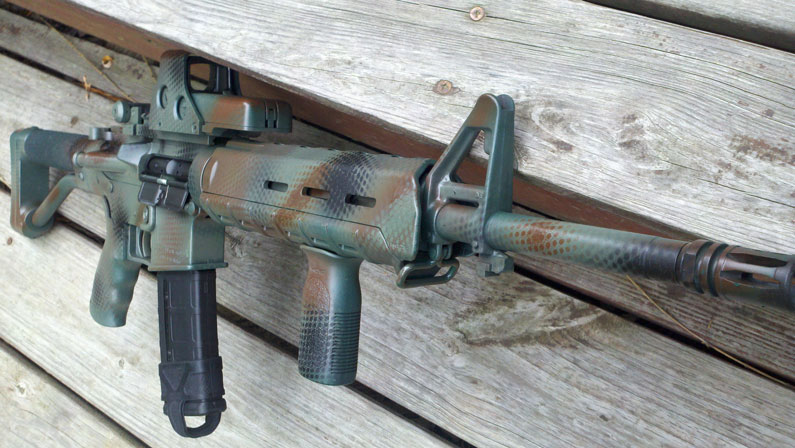
Read the manuals from the can and prepare them correctly for the painting project. It is a good idea, to begin the process with the one thin layer of the camouflage paint that you always wanted to have. Choose the colors you will be using and lightly spray the firearm.
Make sure that the can is pointed down or at the downward angle that is about 9 inches from the gun. After you have applied the first coat, you need to wait for about ten minutes for the paint to properly dry. After that, you can apply the second finish. That way the gun will have that fresh and modern look. Wait for about twenty minutes or more so the coating can adequately dry.
Tap the paint with your finger. If the surface is not sticky, then rub the paint with all your fingers. You will have that smooth feeling if it is dried thoroughly. Bear in mind that some parts will require more than two layers of paint so you will get the best possible look.
Conclusion
Preparing your area, the right paint and your weapon are essential before you start the DIY project. If you are the gun owner who wants to color their firearms but doesn’t know how to prepare everything that this job requires, you are at the right place. We have explained some necessary steps that you need to take before you start this task.
Follow our guide, and you will learn how to do that efficiently and in no time! Choose the right color depending on your personal preferences and start painting your gun today!
The post How to Prep your Gun for Painting appeared first on Tool Nerds.
from Tool Nerds https://ift.tt/2LjsEZ1
via IFTTT
No comments:
Post a Comment