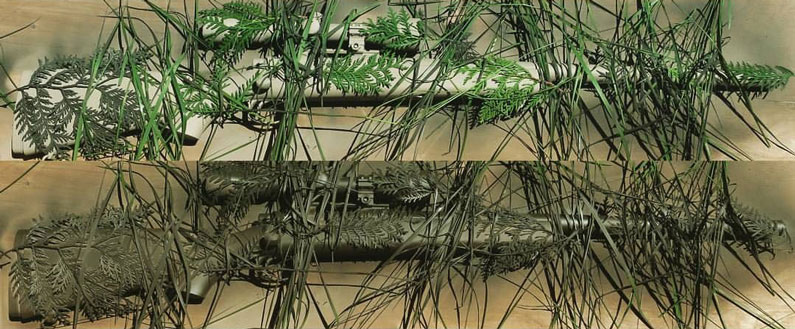
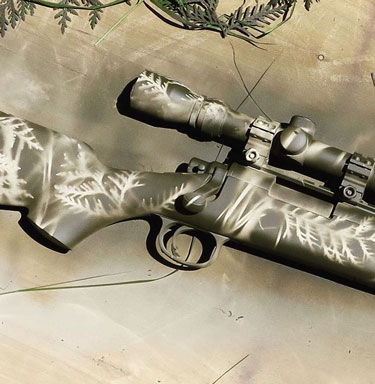
- Because it breaks up the silhouette and shape of your weapon, offering you better concealment and camouflage
- Purely for aesthetic reasons
Why spend more money on something that could be done in a few hours and for the lower price? With this easy guide, you will learn how to paint an airsoft gun in no time!
Keep reading to know more.
1. Choose the Gun
First things first, you need to decide which weapon you want to paint. Bear in mind that not all of them look good with different color. For example, some of them look their best in blacks such as MP5s, G36s, and other HK submachine firearms. On the other hand, SAWs, Sniper rifles, M4s, M16s you might want to repaint.

2. Decide What Parts You Want to Paint
There are many possibilities and you can choose the design you prefer. For M16s and M4s and other variants of these weapons, you should spray the whole gun. But for others, such as snipers and SAWs, you should color only plastic parts. That way you will get the best results. Although it is up to you to decide how you will paint your weapon, we are just giving you some directions of the most preferable ways.
3. Clean your Gun
Preparing your firearm before painting job is the essential thing to do. Clean it from grease, dirt and duct as much as possible so the color can stick properly. If you are using strong cleaning chemicals or alcohol make sure you remove all the traces of the fluids before you start the process because it could ruin the paint job.

4. Mask the Gun’s Areas You Don’t Want to Paint
Cover the parts of your gun that you don’t want to color. You can use Blu Tack or masking tape which you will find very useful. Be sure to do that correctly; otherwise, you will have to deal with issues of destroyed areas and then spend a lot of time cleaning them. Carefully mask the sensitive parts so you won’t have any problems when you start the process. You can also use some clay to fill the holes on your gun. When you have correctly done that, you can paint your weapon without making a mess.
5. The Layout
Lay out plenty of newspapers or cardboard to cover the floor or your desk to keep the paint from contact with the dirt. Make sure that your weapon can be placed on it without wiggling. The next thing you need to pay attention is the protection. Put on your glasses and prepare for painting process.

6. Paint the Gun
Take the spray color for guns you want to use, and lightly spray your gun with the can pointed at a downward angle at about eight inches from the object. Remember not to hold your weapon closer than that. The coating needs to be light for now. If you would prefer to cover it one more time with the paint, then you should first wait for about ten minutes for the first coat to dry. When you have done that correctly, use the color and repeat the action for the second finish. Depending on the weather you will need to wait 20 minutes to one hour for the paint to be thoroughly dried.
7. Tap the Painted Parts
If the surface seems dry after you have tapped all the painted area with a blade of grass, you should lightly touch it one more time with one finger. The parts shouldn’t be sticky. Then rub all your fingers over it one more time. The paint is completely dry, if they feel smooth.
Go over some spots that you have missed, using the same color. You might need to color some parts more than two times to get the best look it’s possible. Or if you would like to use more than one color, repeat all these steps. But, bear in mind to use another color only when the first one is fully dried.

8. Curing Time
Some paints will require 2 days to cure, and others might take up to six weeks. We recommend leaving the paint to cure for about one week. That way you will be sure it is ready for use. You could also reduce the drying time by baking the new color for about 30 minutes to one hour in the oven at 110 degrees F.
Nevertheless, before you start painting your weapon, you should choose the right gun paint. Check out our latest reviews and find out which one will suit your needs. Every spray can come with the manual. Read it carefully, and follow their instructions.
9. Last Steps
When the paint is dry, remove all the tapes from the areas you didn’t want to color and clay that you used to fill the gun’s holes. Make sure you do that gently, so you don’t make a mess. Your gun is now ready to be used.
Conclusion
For those of you who want to repaint their weapon but don’t know how, this article will help you to do this job right. Follow our guide to spray paint your airsoft gun easily and quickly. You can choose different colors and create great effects, or you can use only one. That depends on your personal preferences. Go try it out and don’t hesitate to leave the comment below on what your gun turned out.
The post The Best Way to Paint an Airsoft Gun appeared first on Tool Nerds.
from Tool Nerds https://ift.tt/2sO2eHp
via IFTTT

No comments:
Post a Comment